
Heavy duty wall hooks for drywall hold only as much as the weakest part behind them. This article sits under the heavy duty wall hooks overview and covers one job: mounting a heavily loaded hook on a gypsum wall. Drywall alone offers surprisingly little holding capacity. A plain nail in drywall supports between 5 and 10 pounds1, so a hook carrying coats, bags or tools needs a stud or a rated anchor. The steps that follow cover both routes, with tested load figures and a simple rule for setting a safe limit.
Quick Answer
How do you mount heavy duty wall hooks on drywall?
Drive the hook’s screws into a wood stud whenever one lines up, because gypsum alone grips a fastener poorly. Where no stud is available, use a toggle or molly anchor and size it with a safety margin. This Old House advises dividing an anchor’s shear rating by 4, so an anchor rated for 100 pounds safely supports 25 pounds2.
Key Takeaways
- An installed hook is only as strong as the lowest of four limits: the hook, the screw, the anchor and the wall itself.
- Wall studs are typically spaced 16 or 24 inches apart2, so a stud is never far from any hook position.
- In a Family Handyman test in 1/2-inch drywall, a snap toggle anchor rated at 80 pounds held 180 pounds before failing3.
- Working limits sit far below failure loads: This Old House places toggle bolts at 25 to 50 pounds in drywall2.
- The most common misconception is reading the hook’s rating as the wall’s rating, when that number describes only the metal.
Before You Begin: What Drywall Can and Cannot Hold
Drywall is a finish surface, not a structural one, so every heavy hook installation starts by deciding what will actually carry the load. Regular 1/2-inch panels were the most commonly used drywall in new residential construction and remodeling4. That thickness gives a screw thread very little material to bite into.
Drywall is a panel of compressed gypsum plaster faced with paper on both sides and fixed to wood or metal framing. Panels come in four thicknesses: 5/8, 1/2, 3/8 and 1/4 inch4. The gypsum core crushes under point pressure and crumbles around a stripped hole. That is why a bare screw in drywall pulls out so easily.
A wall stud is a vertical wood or steel framing member that the drywall is screwed to. Studs carry the house’s structure, so a screw driven into one grips solid material instead of chalky gypsum. Every decision in this article returns to one question: is there a stud behind the spot where the hook must go?
Gather the following tools and materials before drilling, so the installation runs without interruption:
- A stud finder, or a strong magnet that sticks to drywall screw heads
- A drill with bits sized to the screws and anchors you plan to use
- A spirit level, a pencil and a measuring tape for marking positions
- A bathroom scale, to weigh the heaviest item the hook will carry
- The hook’s mounting hardware, plus anchors rated for the load if no stud lines up
- Time: under an hour for a single hook; difficulty: beginner to intermediate
Treat the drywall as a skin over the frame: it decides how the install looks, while the stud or the anchor decides whether it holds.
How Heavy Duty Wall Hooks for Drywall Carry a Load
A loaded hook pushes its weight through four parts in sequence: the hook body, the mounting screws, the anchor or stud, and finally the wall itself. Each part has its own limit, and the installed capacity equals the lowest of them.
Shear load is force acting parallel to the wall surface, like the straight-down pull of a coat hanging close to the plate. Pull-out load is force that tries to draw a fastener straight out of the wall. A hook turns part of its downward load into pull-out at the uppermost fastener, because the hanging point sits away from the wall.
That lever effect explains why hook shape matters: a hook whose tip reaches far from the wall multiplies the pull on its upper fastener. A short, close hook keeps the load near the wall, where it acts mostly as shear. The same jacket on a longer arm asks more of the screws.
| Part | What sets its limit | Typical failure | What to check |
|---|---|---|---|
| Hook body | Material, thickness, welds or forged joints | Arm bends or a joint cracks | Solid metal and a clean joint at the plate |
| Mounting screws | Diameter, length and thread engagement | Screw snaps or strips out | Length reaches past the drywall into wood or anchor |
| Anchor or stud | Anchor type and size, or wood density | Anchor pulls through the gypsum | Rating covers the load with a margin |
| Wall panel | Gypsum thickness and condition | Core crushes or crumbles around the hole | Sound, dry board with no earlier damage |
The capacity printed for a hook describes the first row of that table and nothing below it. RTZEN hooks are hand-forged from solid iron, then zinc-galvanized and powder-coated, so the hook body is rarely the part that gives way. The fastener and the wall behind it are where heavy installations usually fail.
Size the installation for the weakest row, never the strongest. A solid iron hook can outlast the house, but only if the fastener behind it is chosen to match.
Step 1: Weigh the Load and Set a Working Limit
Step 1 ends with one number: the working load limit the install must meet. Weigh the heaviest item the hook will hold, then add a margin for how the hook gets used.
A working load limit is the maximum load a fastener should carry in everyday service, set well below the load at which it fails. This Old House recommends dividing a manufacturer’s shear rating by 4 to find the safe working load, so an anchor rated for 100 pounds supports 25 pounds2. A second This Old House guide frames the same rule from the other side: anchors should hold four times the weight being hung1.
- Weigh the heaviest item on a bathroom scale, using a loaded backpack or a full tool bag rather than an empty one.
- Add every item that will share the hook at once. A winter coat hook carries a coat, a scarf and a bag together.
- Account for movement, since a bag yanked off a hook or a child swinging from one adds a sudden force well above its resting weight.
- Multiply the total by four to get the minimum rated capacity of the fastening you choose.
As a worked example, suppose a coat, a laptop bag and a scarf weigh twelve pounds together. Twelve times four calls for a fastening rated near fifty pounds, which already rules out a plain nail and a small plastic sleeve.
To verify the step, write the target number on the anchor packaging or a sticky note before you shop. If one anchor cannot meet it, plan for a stud, or for a rail that spreads the load across several fasteners.
The four-times margin is not timid engineering, because it absorbs the yank, the swing and the slow crumble of gypsum that a static weight never shows.
Step 2: Find the Studs Behind the Drywall
Step 2 ends with a marked stud center at or near the hook position. In most homes, wall studs are typically spaced 16 or 24 inches apart, measured from center to center2.
On center refers to the distance measured from the middle of one stud to the middle of the next. With 16-inch spacing, no point on a wall sits more than 8 inches from a stud. That geometry makes a stud mount possible far more often than most people assume.
- Scan across the planned position with a stud finder and pencil-mark both edges of each stud it reports.
- Use an electrical box as a reference: boxes attach to a stud, so This Old House suggests measuring 16 inches on center from one to find the next1.
- Confirm with a magnet, which sticks to the drywall screw heads running in a vertical line along each stud.
- Drill a small test hole inside the marked area, at a spot the hook plate will later cover.
To verify the step, watch the test bit: it should meet firm resistance right after the drywall and keep cutting pale wood shavings. If it suddenly punches into a void, the mark is off, so shift sideways and test again.
Hook layout can also bend toward the studs: where a row of hooks is planned, set the spacing so at least the end hooks land on studs. Planning the full row around the framing is easier than forcing each hook onto anchors. The entryway drop zone guide covers hook height and spacing for that kind of row.
Spend the extra minutes on the stud search, because a confirmed stud turns an anchor decision into a screw decision, which is simpler and stronger.
Step 3: Fasten the Hook Directly Into a Stud
Step 3 ends with the hook screwed through the drywall into solid wood, the strongest mount a gypsum wall offers. Screw grip in wood is well studied: equations built on Fairchild’s data from over 10,000 tests still underpin design values for wood screws5.
“It’s best to anchor directly into wall studs for the most secure mounting of heavy objects.”
Tim Snyder, This Old House2
The same research reproduces the Wood Handbook formula for a wood screw’s ultimate withdrawal load, p = 15,700 G²DL5. In that formula, G stands for wood specific gravity, D for screw diameter and L for thread penetration, and three practical rules follow.
- Thread length in wood counts; drywall does not. Grip grows in direct proportion to the thread inside the wood. A screw that barely clears the gypsum leaves very little thread in the stud.
- Screw diameter contributes proportionally as well. A thicker screw of the same length spreads its grip over more wood fiber.
- Denser lumber grips considerably harder. Specific gravity enters the formula squared, so a modest gain in wood density brings a large gain in grip.
Those rules turn into a short routine at the wall:
- Hold the hook plate level on the stud marks and pencil each screw hole.
- Drill pilot holes slightly narrower than the screw’s core, through the drywall and into the stud.
- Use screws long enough to pass the drywall and seat at least an inch of thread in wood. Swap short screws for longer ones with the same head style if needed.
- Drive each screw until the plate sits flat and firm, then stop before the head crushes the drywall paper.
When a single plate cannot reach a stud, a rail can help. A rail-style rack such as the 5-hook coat rack carries several hooks on one backplate. Its screw positions can follow the framing while the hooks stay evenly spaced. Check the backplate length against your stud spacing before you buy.
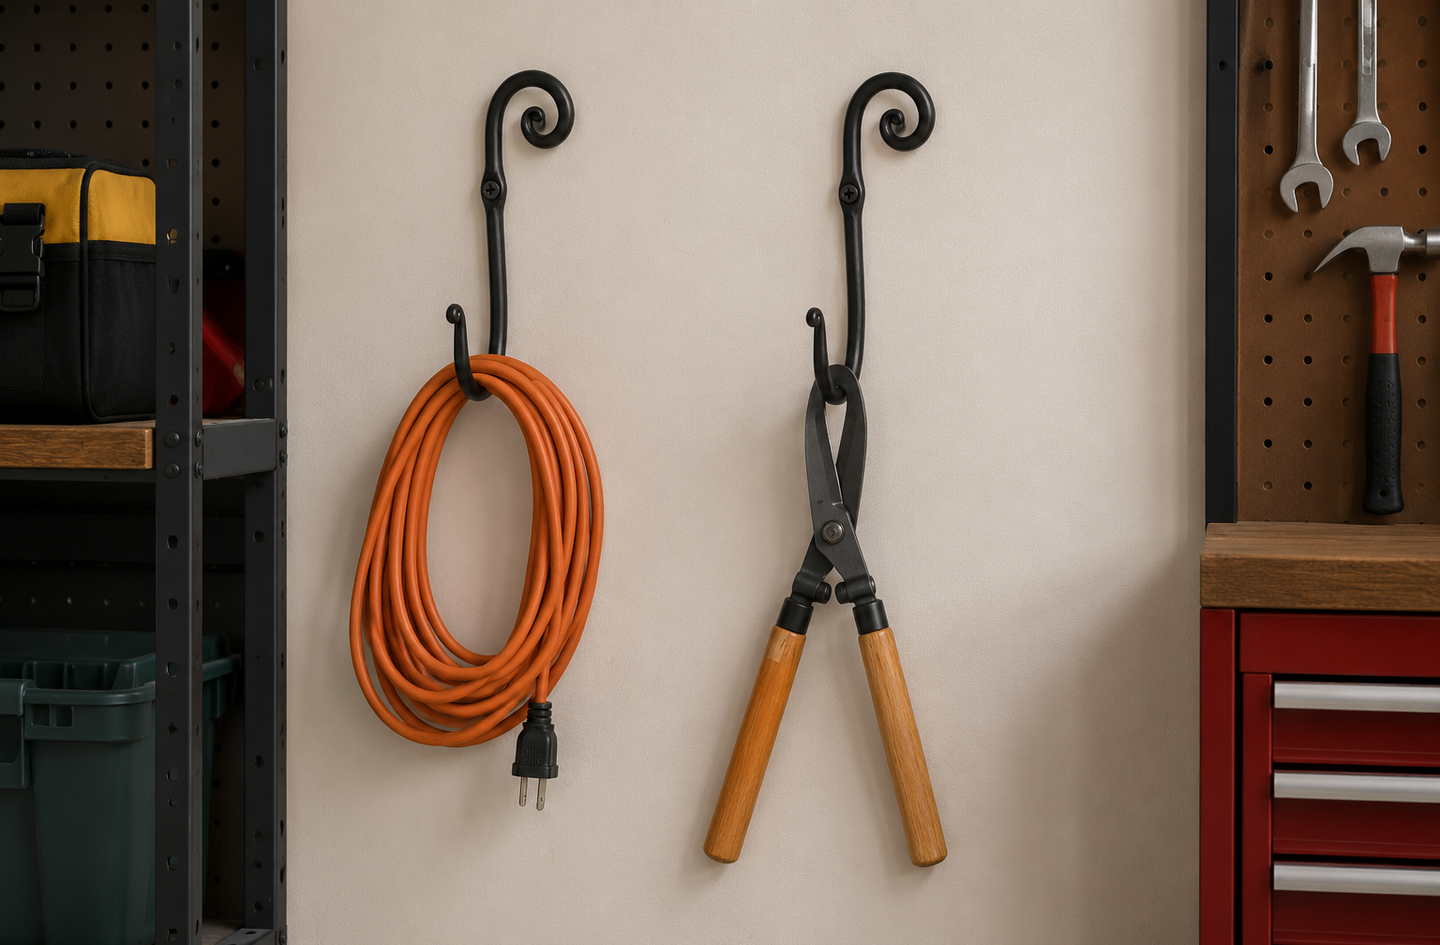
Garages carry the heaviest hook loads in most homes, from extension cords to long-handled tools. The garage hook layout guide covers how to spread that weight across a whole wall.
To verify the step, pull the loaded hook firmly downward and outward. A stud mount should not shift, creak or flex at the plate.
Whenever a stud and an anchor are both available, the stud is the better choice. Its grip comes from wood fiber, which is considerably more forgiving than gypsum.
Step 4: Choose a Drywall Anchor When No Stud Lines Up
Step 4 ends with an anchor matched to the working limit from Step 1. This Old House rates expanding plastic sleeves at up to 25 pounds, molly bolts at 10 to 50 pounds and toggle bolts at 25 to 50 pounds2.
A hollow-wall anchor is a fastener that spreads, grips or locks behind a drywall panel, so a screw can hold without reaching a stud. Each type presses on a different area of gypsum, which is why their limits differ so much.
Expanding Plastic Sleeves
A plastic sleeve flares as the screw drives in and presses against the sides of its hole. This Old House places these sleeves at up to 25 pounds2. They suit keys, towels and light bags, although over-tightening splits the sleeve or spins it uselessly in the hole.
Self-Drilling Threaded Anchors
Self-drilling anchors cut their own coarse thread into the gypsum with a screwdriver or drill. In the Family Handyman test, a twist-lock model claimed 75 pounds and held 100 pounds3. They install quickly, but their grip depends entirely on the gypsum around the thread.
Molly Bolts
A molly bolt is a metal sleeve anchor whose body folds into a flange behind the drywall as its screw tightens. This Old House rates mollies at 10 to 50 pounds in drywall and plaster2. The sleeve stays in the wall, so the screw can come out and go back in without losing grip.
Toggle Bolts and Snap Toggles
A toggle bolt is an anchor with a wing or metal bar that opens behind the panel and clamps the gypsum from the back. In the Family Handyman test, a snap toggle claimed 80 pounds and held 180 pounds, the highest result in the group3. Toggles require a larger opening, so mark the position carefully before drilling.
“All the anchors we tested lived up to the claims, and all but one exceeded their weight rating.”
Jason Ingolfsland, Family Handyman3
The table below sets the two sources side by side. The working ranges come from This Old House2, and the claimed and peak loads come from the Family Handyman test in 1/2-inch drywall3. They measure different things, so read across a row rather than down a column.
| Anchor type | Working range, This Old House | Package claim in test | Peak load in test | Best fit |
|---|---|---|---|---|
| Expanding plastic sleeve | Up to 25 lb | 22 lb, ribbed model | 80 lb | Keys, towels, light bags |
| Self-drilling threaded | Not listed | 75 lb | 100 lb | Medium loads, quick installs |
| Molly bolt | 10 to 50 lb | Not tested | Not tested | Medium loads, removable screw |
| Toggle bolt or snap toggle | 25 to 50 lb | 80 lb, snap toggle | 180 lb, snap toggle | Heavy coats, bags and tools |
Within each group, the package claim sits well under the peak test load3, and the divide-by-4 working limit sits far below both2. For the snap toggle, that working limit is 20 pounds against a 180-pound test peak.
Choose the anchor from the working limit, not from the test peak. A test peak shows the margin a rating protects; it is not a load to plan around.
Step 5: Install the Anchor, Load-Test and Inspect
Step 5 ends with a hook that has carried its real load and passed a hand test. Even a well-chosen anchor fails if the hole is wrong, and Family Handyman installed every test anchor in 1/2-inch drywall following each manufacturer’s instructions3. Matching those instructions is how a rating carries over to your wall.
- Drill the exact hole size printed on the anchor package. An oversized hole lets a sleeve spin; an undersized one cracks the gypsum around it.
- Set expansion and self-drilling anchors flush with the wall surface, never sunk below the paper.
- For a toggle, pass the bolt through the hook plate first, then thread on the toggle and push it through the wall.
- Tighten until the plate is snug and stop, because extra turns crush gypsum and lower the anchor’s grip.
- Hang the real load gradually, then press down firmly by hand and watch the plate edge for movement.
Check what ships in the box before you start: the Swirl hooks come with wall mounting screws, which suit a stud mount directly. Away from a stud, the same hooks need anchors bought to match the working limit from Step 1.
Inspect heavy hooks each season for hairline paint cracks around the plate, a plate that has started to tilt, or a screw head that turns without tightening. Any of these means the gypsum has started to give, so move the hook onto a stud or a larger anchor.
A hook that passes a firm hand test on day one can still loosen in a year. A quick seasonal inspection costs nothing and identifies gypsum fatigue early.
Common Mistakes With Drywall Hook Installations
Most failed drywall hook installations trace back to five avoidable mistakes, and the worst is trusting gypsum alone. A plain nail in drywall holds between 5 and 10 pounds1, which a single loaded backpack can exceed.
Reading the Hook Rating as the Install Rating
A strong hook invites the assumption that the whole installation is strong, yet the hook’s capacity covers only the metal. Set the working limit from the fastener and the wall, as in Step 1, and treat the hook rating as a ceiling for the metal alone.
Driving a Plain Screw Into Bare Drywall
A screw with no stud and no anchor behind it grips nothing but chalky gypsum. It feels secure initially and then gradually loosens as the load rocks back and forth. Every fastener in a heavily loaded hook should terminate in solid wood or in a rated anchor.
Splitting One Plate Between a Stud and an Anchor
When one screw hits a stud and the other lands in an anchor, the stiffer stud screw takes the load first. The anchor carries little until the stud screw starts to give. Size each fastener as if it had to carry the full load on its own.
Over-Tightening the Anchor
Extra turns feel like extra security, but they crush the gypsum that holds the anchor. A plastic sleeve then spins, and a toggle bites into the panel’s back face, so tighten until the plate is snug and stop.
Ignoring How Far the Hook Projects
A long arm turns a hanging load into a prying force on the uppermost fastener. Projecting hooks need a stud or a toggle, even for moderate loads. A compact J-shaped design such as the Double Plate hooks keeps the hanging point closer to the wall.
Each of these mistakes moves load onto the weakest part of the chain. Correcting them costs nothing except a few additional minutes at the wall.
What a Secure Drywall Hook Installation Looks Like
A secure installation shows four signs: a flat plate, no movement, a sized margin and intact paint. The margin is the measurable one: anchors should hold four times the weight hung on them1, which matches the rule from Step 1.
- The plate sits flat and level against the wall, with no gap at any edge.
- A firm downward and outward push by hand produces no creak, flex or shift.
- The fastening’s rated capacity is at least four times the heaviest load the hook will carry.
- After a few weeks of daily use, the paint around the plate shows no hairline cracks.
A stretch goal for busy walls is to move high-traffic hooks onto studs or onto a rail that reaches them. For what makes the hook itself last, the wrought iron durability guide covers solid construction, joints and protective finishes.
Success is quiet: a well-mounted hook draws no attention for years, because the wall behind it never has to do more than it can.
Frequently Asked Questions
How much weight can drywall hold without a stud?
Very little on its own, since a plain nail in drywall holds between 5 and 10 pounds1. Rated hollow-wall anchors raise that limit, but each type has its own range. Anything heavier than a loaded coat hook belongs on a stud or on a toggle anchor sized with a safety margin.
Are toggle bolts stronger than molly bolts in drywall?
Toggles generally reach higher, and This Old House rates mollies at 10 to 50 pounds and toggle bolts at 25 to 50 pounds2. A toggle clamps a wider area of gypsum from behind, which is why a snap toggle posted the highest result in the Family Handyman test.
How far apart are wall studs?
Wall studs are typically spaced 16 or 24 inches apart, measured from center to center2. Electrical boxes attach to a stud, so measuring 16 inches on center from one box is a quick way to find the next stud1.
Can I use the screws that come with a wall hook?
Yes, when they are long enough, because regular 1/2-inch drywall is the most common residential panel4 and that layer adds no grip. A screw must pass through it and still seat about an inch of thread in the stud. Away from a stud, pair the screws with a rated anchor.
Why do drywall anchors pull out of the wall?
The gypsum around the anchor crushes, and overloading, over-tightening and an oversized hole all speed that up. This Old House advises dividing a shear rating by 4, so an anchor rated for 100 pounds safely supports 25 pounds2. Respecting that margin keeps the gypsum well inside its limits.
Limitations and Edge Cases
- Steel studs change the method, because the screw-grip formula applies to wood, so a hook on steel framing needs screws or toggles specified for metal studs.
- Plaster and lath walls in older homes behave differently from gypsum panels, while the load figures here apply to 1/2-inch drywall.
- The peak loads come from one Family Handyman test of specific products. Installed results vary with hole size, panel condition and workmanship.
- Ceiling hooks load their fasteners in pure pull-out and need a ceiling joist behind them, a case that sits outside this wall-mounting angle.
References
Methodology: every figure in this article comes from an independent published source linked below, each source was checked live and read for its supporting sentence on October 2, 2026, and the article was reviewed by RTZEN co-founder Rami Abramson.
- This Old House – How To Hang Something Heavy On a Wall, Jim Gorman, updated June 2026.
- This Old House – How To Choose the Right Hanging Hardware, Tim Snyder, updated June 2026.
- Family Handyman – How Much Weight Can Drywall Anchors Hold, HomeLAB test by Jason Ingolfsland, updated October 2024.
- Family Handyman – A Guide to Drywall Sizes, Mark Petersen, August 2023.
- USDA Forest Service Treesearch – Screw Withdrawal: A Means to Evaluate Densities of In-situ Wood Members, Cai, Hunt, Ross and Soltis, Proceedings of the 13th International Symposium on Nondestructive Testing of Wood, August 2002.
Conclusion
Heavy duty wall hooks for drywall hold when the fastening behind them is sized for the load. Find a stud first, use a toggle or molly anchor when none lines up, and keep a four-times margin between the load and the rating. The hook’s own number describes the metal, never the wall.
A solid iron hook, hand-forged and finished with zinc and powder coating, is backed by a Lifetime Warranty, so a sound mount is the final piece of the installation. For the wider topic, see the heavy duty wall hooks overview.