
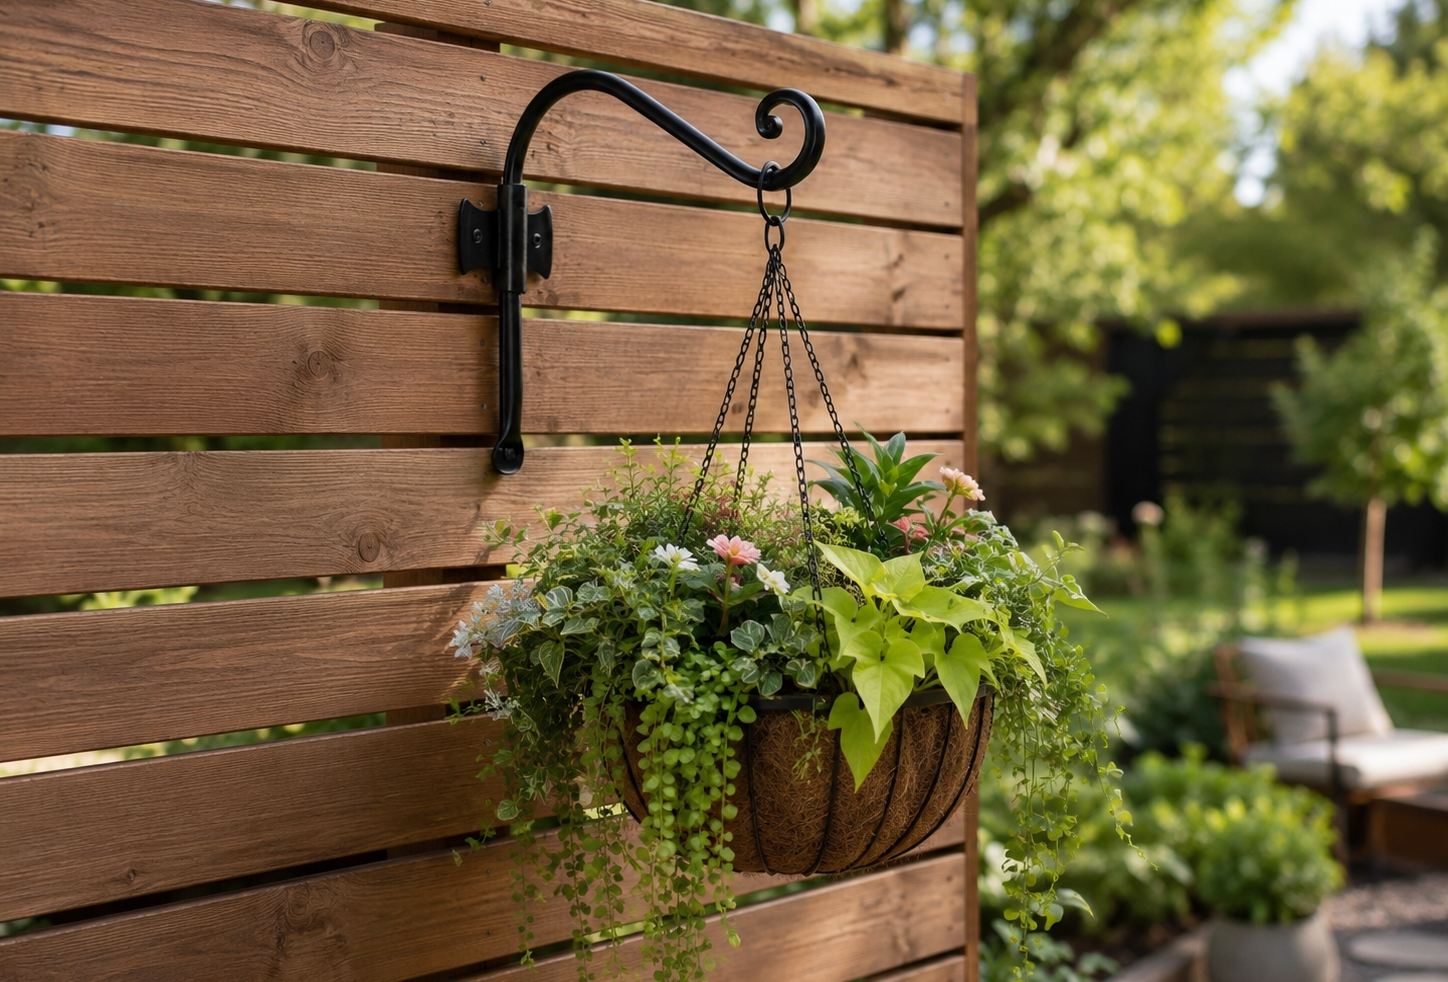
Most fence boards split not because the screws are wrong, but because the hole is too small. For context on hook and bracket styles, see the Plant Hangers overview. Western red cedar – the most common fencing species in North America – has a Janka hardness of just 350 lbf,1 softer than pine or oak, which means any screw driven without a pilot hole tears the grain apart instead of threading into it. This guide walks you through every step for hanging fence plant hooks without cracking a board, from choosing the right bracket style to loading the first basket.

Quick Answer
How do you mount fence plant hooks without splitting the board?
Pre-drill a pilot hole sized to roughly 65% of the screw shank diameter, position the bracket over a solid horizontal rail rather than a thin vertical picket, and drive #10 x 2″ stainless steel screws at low speed with light torque. Cedar’s Janka hardness of only 350 lbf1 makes it vulnerable to splitting; a correctly sized pilot hole eliminates that risk entirely.
Key Takeaways
- Cedar’s Janka hardness of 350 lbf makes pre-drilling mandatory within 1 inch of any board edge.2
- Always mount through a solid horizontal rail (2×4 or 2×6), not the thin vertical pickets that split first under sideways load.
- Match the pilot bit to the screw gauge: 7/64″ with a #8 screw, 1/8″ with a #10 screw, and 9/64″ with a #12 screw near edges.3
- Use #10 x 2″ stainless steel screws for standard 3/4″ cedar pickets going into a 2×4 rail.2
- A wet hanging basket is heavier than it looks – larger containers hold more soil and water and weigh significantly more when fully saturated.5
What You’ll Need Before You Start
Gather every tool before you put pencil to fence. Stopping mid-mount to switch bits or hunt for a longer screw is how over-torquing happens.
Tools:
- Power drill/driver with variable-speed trigger
- Drill bit set – you’ll need at minimum 7/64″, 1/8″, and 9/64″ twist bits (Step 3 shows which gauge uses which size)
- Tape measure and pencil
- 4-inch torpedo level (fence rails aren’t always perfectly plumb)
- Wooden awl or a finish nail to probe for the hidden horizontal rail behind the pickets
Hardware:
- #10 x 2″ stainless steel exterior screws, minimum two per mounting hole on the bracket plate2
- Your chosen RTZEN fence hook (see Step 1 for style guidance)
Estimated time: 20-35 minutes per hook, including layout and level check.
Difficulty: Beginner. If you’re comfortable drilling a hole in wood, you can do this.
Safety: wear safety glasses when drilling. Cedar splinters are light, but the grain flies at speed.
Step 1: Choose the Right Fence Plant Hooks for Your Rail
By the end of this step you’ll have selected the bracket that fits your fence style and basket weight. The wrong choice isn’t dangerous – it just looks awkward or limits what size pot you can hang.
Three bracket types work well on cedar fencing. They differ in how far the arm extends from the fence face and how the visual weight reads against the pickets. Use the comparison below as a starting point, then check each product’s listed load rating against the saturated weight of your basket.
| Style | Arm projection | Mount holes | Visual character | Best fence type |
|---|---|---|---|---|
| Curved bracket 8″ | 8 in | 2 | Clean arc, minimal profile | Privacy, board-on-board |
| Swirl hook | ~8 in | 2 | Decorative scroll, ornate | Picket, cottage, Victorian |
| Shepherd hook 7.5″ | 7.5 in (arm sweep) | 2 | Classic upward curve | Post-and-rail, ornamental |
Compact curved brackets
The curved hooks seat both mounting screws in the same horizontal rail, so the load path is short and direct. The compact profile keeps the basket’s center of gravity close to the fence face, which reduces the bending moment that tries to pull the screws forward. This is the most reliable starting point for standard 6-foot cedar privacy fences with 2×4 intermediate rails.
Because the bracket plates are flat and the arm curves outward cleanly, the shadow line against the fence is minimal. You don’t need to pre-fit anything – the holes in the plate tell you exactly where to drill.
Swirl decorative hooks
The swirl hook adds a forged scroll to the bracket arm without changing the mounting geometry. Both screws still go into the same horizontal rail, and the load rating is comparable to the curved bracket. The main reason to choose it is the visual detail – the scroll reads well against painted picket fences and cottage-style board fencing where a plain arc would look sparse.
Installation is identical to the curved bracket. The scroll sits on the face of the fence, between the mount plate and the basket ring, and adds no meaningful projection depth.
Shepherd-style hooks
The shepherd hooks use an arm that curves upward past the mount plate, raising the basket ring above the fence’s top rail line. That extra sweep is useful when your fence has a decorative cap rail that would otherwise block a straight outward bracket. Because the arm extends up and away from the fence before hooking down, the lever moment under a loaded basket is slightly higher than on the curved bracket, so confirming the bracket’s rated capacity before hanging heavy pots matters more here.
For deeper guidance on sizing bracket arm length to pot diameter and soil weight, see the bracket sizing guide.
Step 2: Locate the Horizontal Rail Behind Your Fence
By the end of this step you’ll know exactly which picket hides the rail and where on that picket you should drill. Getting this wrong is the most common cause of a hook that works loose over a season – not the pilot hole size, but mounting into thin picket wood with no backing rail to bite.
A standard cedar privacy fence uses two or three horizontal rails running behind the vertical pickets at regular intervals: typically one near the top, one near the bottom, and one in the middle on taller panels. The rails are usually 2×4 lumber on edge, which gives you a solid 1.5-inch-deep bite for a 2-inch screw after passing through the 3/4-inch picket face.
Finding the rail without removing pickets
Press a wooden awl or finish nail firmly across the face of the picket while moving slowly upward. When the nail punches through into empty air, you’ve found the gap between pickets and rail. When it hits resistance after passing through the picket face, you’ve hit the rail. Mark that spot with pencil, then use a tape measure to confirm the rail runs horizontally – probe at the same height two pickets away to verify.
An alternative: run your hand along the back of the fence if you can access the yard side. You’ll feel the rail edge protruding behind the picket nails. The exact center of the rail face is usually 19-20 inches from the bottom of the fence for a standard six-foot panel with two rails, and 40-42 inches for the upper rail.
Marking your bracket position
Hold the bracket plate against the picket face with the arm pointing outward. Use the torpedo level to confirm the plate is plumb. Slide the plate up or down until the mounting holes center on the horizontal rail you located. This usually means the holes land between 1/2 inch and 3/4 inch from the top or bottom edge of the rail – never right at the edge of the rail itself, where the wood grain is thinner and more prone to checking.
Mark each mounting hole with a sharp pencil. Then step back and visually confirm the mark sits at the right height for the basket you have in mind – a 14-inch hanging basket will sway level when the hook’s ring is at about 6 feet above the ground.
Step 3: Mark Your Pilot-Hole Positions
By the end of this step you’ll have clean pilot holes at each pencil mark, sized to let the screw thread grip while the shank passes freely. This is the single most important technical step on cedar: pre-drilling stops screws from splitting cedar, and you should always do it within 1 inch of any board edge or at the ends of pickets.2
Why cedar boards split without a pilot hole
Cedar’s specific gravity is just 0.31,1 meaning it’s a low-density wood relative to its stiffness. The trade-off is that it splits easily when a screw’s tapered shank pushes fibers apart without a relief channel. On harder woods like oak, you can sometimes skip the pilot and get away with it. On cedar – especially near board edges – the split can run three or four inches up the grain in a single pass. Pilot holes cost 20 seconds each. Split pickets cost a new board and a return trip to the hardware store.
The target bit size is roughly 65% of the screw shank diameter. That keeps the hole wide enough for the shank to pass without friction while leaving enough wood for the threads to bite and hold. Place the drill bit in front of the screw before drilling: the threads should visibly stick out on both sides of the bit, but the solid shank should be hidden behind the bit’s diameter.2
Reading the pilot hole chart
The chart below synthesizes the recommended pilot bit sizes for the three most common screw gauges used in cedar fence work. The orange bars show the recommended pilot hole diameter; the blue dashed lines show the corresponding screw shank width. The gap between the bar end and the line is the wood the threads grip.
For standard cedar fence hook mounting using #10 screws, drill a 1/8″ pilot at each pencil mark.3 Set the drill to low speed and keep it perpendicular to the fence face. A bit that wanders off perpendicular will exit the rail at an angle, which reduces thread engagement.
Drill depth: go through the picket face and at least 1 inch into the rail. For a standard 3/4-inch picket and a 2-inch screw, that means drilling to about 1.5 inches total depth, leaving 0.5 inches of engagement past the point. A depth stop or a piece of tape on the bit shank keeps you consistent across multiple holes.
Step 4: Drive the Fasteners Without Over-Torquing
By the end of this step both screws are seated firmly in the rail with the bracket plate flush against the picket face. Over-driving a screw into cedar is the second most common cause of a split board after skipping the pilot hole. The fix is simple: low clutch setting, slow trigger, stop when the screw head is flush.
Choosing outdoor fasteners for cedar
Stainless steel is the first choice for any cedar fence mounting. Cedar contains tannins and organic acids that accelerate corrosion in zinc and electro-galvanized coatings; a zinc-plated screw in cedar can streak with black tannin stains and weaken structurally within two or three seasons. The Western Red Cedar Lumber Association states its position clearly:
“Screws must be long enough to penetrate 1″ (25 mm) into support members.”
Western Red Cedar Lumber Association, Outdoor Fasteners4
That same guidance notes that double hot-dipped galvanized screws are an accepted secondary option, but stainless steel is the preferred material for cedar.4 Grade 304 stainless handles most outdoor residential applications. If you’re near a coast with salt air, grade 316 is worth the small price premium.
The screw spec for standard cedar fence work is #10 x 2″ stainless steel for 3/4-inch pickets going into 2×4 rails.2 That length gives you 0.75 in of picket depth plus 1.25 in of rail engagement – past the WRCLA’s 1-inch minimum with a small margin.
Driving technique on cedar
Set your drill/driver clutch to a low torque setting – somewhere in the range of 4-6 on a typical 18-volt driver. Start the screw by hand for the first few threads to confirm it’s tracking straight in the pilot hole, then engage the drill at the slowest speed your trigger allows. Cedar strips easily at high RPM; slow and controlled gives the threads time to seat properly.
Stop when the screw head is flush with the bracket plate surface. A slightly counter-sunk head is acceptable; a head that dimples the bracket metal is over-driven. If you feel the drill clutch slip before the head is flush, back the screw out slightly, widen the pilot hole by one size, and re-drive. Stripping the hole at this point is salvageable. Splitting the picket at this point is not.
Drive all screws finger-snug before fully seating any of them. This gives you a chance to check the bracket plate remains level while everything is still adjustable.
Step 5: Attach the Hook Plate and Load-Test It
By the end of this step the bracket is fully mounted and you’ve confirmed it won’t shift under static load before a basket goes on it.

With both screws seated flush, grasp the bracket arm with one hand and press firmly inward (toward the fence), then pull outward, then try to rotate it clockwise and counter-clockwise. The plate should not shift, creak, or flex against the fence face. Any movement means one of three things: a screw missed the rail, the pilot hole was too wide, or the screw isn’t fully seated. Address it before putting weight on the bracket.
Static load check
Hang a small bucket of water or a bag of sand from the hook ring at roughly the weight you intend to hang. Leave it for two minutes and then re-check the plate movement test. Cedar can compress slightly under sustained point load, and a screw that felt firm dry can loosen a millimeter or two in the first few minutes of real weight. If the bracket shifts, remove the load, tighten both screws by a quarter turn, and repeat the test. One quarter-turn at a time – more than that and you risk splitting the picket around the screw.
If the bracket still shifts after tightening, the screws likely missed the rail center and are gripping only picket wood. In that case, remove the bracket, fill the pilot holes with toothpicks and exterior wood glue, let it cure, and remount 1 inch to the left or right so the new holes land in fresh rail material.
Step 6: Hang Your Basket and Check for Sway
By the end of this step the basket is on the hook, level, and stable enough to stay through wind without banging against the fence face.
Slip the basket chain or hanger cord over the hook ring. Step back and check two things: first, that the basket hangs plumb (a tilted basket means the hang-point on the basket is off-center, not a bracket problem); second, that the basket clears the fence face by at least 3 inches. Clearance matters for two reasons. Water draining from the basket runs down the fence; three or more inches of air gap lets the pickets dry between waterings and slows the weathering cycle. And swing – in wind, a basket pressed close to the fence batters the pickets with every gust.
Basket weight and watering rhythm
Larger, deeper containers hold more soil and do not dry out as quickly as small ones, but they are significantly heavier when fully saturated with water.5 That weight difference matters for fence mounting because the peak load on the bracket and screws happens right after watering, not mid-week when the soil has dried down. If you’re hanging a 14-inch or larger basket, confirm the bracket’s rated load covers the wet weight, not just the basket weight listed on the planter label.
A simple way to estimate wet weight: fill the basket with dry mix, hang it on a luggage scale before attaching it to the fence, then water it to saturation and weigh it again. The difference tells you the water weight your bracket must handle every watering cycle.
Reducing sway in wind
If your fence is in an exposed position and the basket swings more than a few inches in normal wind, two adjustments help. First, use a shorter hook arm – an 8-inch bracket has less lever arm than a 12-inch one, so the basket is physically closer to the fence and the pendulum swing radius is smaller. Second, add a second bracket 18-24 inches to the side of the first and use a long basket or a planter tray that bridges both hooks. The dual-mount turns lateral sway into a much smaller side-to-side wobble because the two anchor points constrain the motion path.
Common Mistakes to Avoid
Most fence hook failures trace back to one of five installation errors. Knowing them in advance takes about two minutes; fixing them after the fact can mean replacing split boards.
Skipping the pilot hole
This is the most frequent error. Cedar’s low density and straight grain make it split predictably along the axis of the screw, and the split often runs up or down from the entry point rather than stopping at the screw head. A 20-second pilot hole eliminates this risk. If you’ve already split a picket, the board will need to be replaced before the hook is re-mounted – glue won’t hold a load-bearing split in outdoor lumber.
Mounting into a vertical picket only
A picket is usually 3/4 inch thick nominal, with actual dry thickness closer to 5/8 inch. A 2-inch screw driven into a picket alone has less than 1.25 inches of wood to grip, much of it near the board edges where the grain is thinnest. Under a loaded basket swinging in wind, that grip works loose over a few weeks. The horizontal rail behind the picket is the structural anchor. Both screws must pass through the picket face and embed at least 1 inch into the rail.
Using zinc-plated or electro-galvanized screws
These corrode quickly in cedar due to the wood’s natural tannin and acid content. Within one to two seasons you’ll see black streaking down the fence face from the screw head and a shrunken, brittle screw shank that won’t hold load reliably. Stainless steel costs a dollar or two more per box and lasts the life of the fence. It’s the only appropriate fastener for cedar fence mounting outdoors.4
Over-torquing the mounting screws
Cedar’s specific gravity of 0.311 means it compresses and strips more easily than denser woods. A screw driven past flush in cedar doesn’t just dimple the surface – it enlarges and rounds the hole, removing the thread engagement that was holding load. Set your drill clutch to low torque, stop when the head is flush, and resist the urge to give it “one more quarter turn for good measure.” That quarter turn is the one that strips it.
Positioning the hook near a picket joint or knot
Cedar boards naturally contain knots. A knot changes the grain direction locally and creates a stress riser around it – a screw driven through or immediately beside a knot will push the knot loose or split the surrounding grain unpredictably. Similarly, the joint between two pickets (where a picket ends and the next begins) leaves a gap that has no wood behind it. Check the pencil-marked position before drilling and shift the bracket 2-3 inches up or down to avoid knots and butt joints.
What Success Looks Like
A correctly mounted fence plant hook should feel completely rigid when you push and pull on the bracket arm. The plate lies flat against the picket face with no gap at any corner. The screws are flush, not recessed or proud. There are no cracks in the picket wood radiating from either screw hole.
Once loaded, the basket hangs plumb and the bracket doesn’t flex visibly when you push the basket sideways. On a calm day the basket hangs motionless. In a light breeze it swings smoothly rather than banging back against the fence face.
After the first heavy rain, check both screws again. Water saturates the wood fibers and causes them to swell slightly, which can loosen a screw that was borderline to start with. A quarter-turn by hand at this point is normal maintenance, not a sign of a failed installation.
Next step: if you’re planning to hang multiple brackets along a single fence run, repeat Steps 2 through 5 for each position. Spacing them at 3-foot or 4-foot centers gives each basket enough room to swing without fouling its neighbor in wind, and keeps the visual rhythm of the fence line even.
Frequently Asked Questions
Do I need to anchor into a stud, or does the horizontal rail count?
The horizontal rail IS the structural anchor in a fence – it’s the functional equivalent of a wall stud in this context. A standard cedar privacy fence has 2×4 horizontal rails running behind the vertical pickets at 24-36 inch centers. Drive both screws through the picket face and into that rail, and the mount is as solid as any stud-backed wall mount indoors. Anchoring into picket wood only – without hitting the rail – is what causes hooks to work loose.
Can I use galvanized screws instead of stainless steel?
Double hot-dipped galvanized screws are acceptable as a secondary option for cedar fence work, but stainless steel is the preferred choice.4 Cedar’s tannins and organic acids corrode zinc coatings faster than they corrode stainless. Electro-galvanized screws (the thin zinc coating on most hardware-store multipacks) are not suitable outdoors on cedar at all – they’ll streak and weaken within a season or two. Use grade 304 stainless for most climates, grade 316 near the coast.
What pilot hole size should I use for fence plant hooks?
For #8 screws, drill 7/64″; for #10 screws (the most common gauge for cedar fence work), drill 1/8″; for #12 screws, drill 9/64″.3 These sizes keep the hole at roughly 65% of the screw shank diameter, which lets the threads bite while the shank passes without splitting the grain. Always pilot within 1 inch of any board edge.
How heavy a basket can I safely hang from a fence hook?
That depends on the bracket’s rated capacity, not just the wood mounting. As a reference point, larger and deeper containers hold more soil and water and are significantly heavier when fully saturated than when dry.5 Always check the bracket’s listed weight rating and compare it to the wet weight of your basket – not the dry planting weight. For heavy planters, look for brackets with a welded brace bar and confirm both screws are seated in the rail, not just the picket.
My fence boards are pressure-treated pine, not cedar. Does this guide still apply?
The pilot hole principle applies to all softwoods, but the specific bit sizes vary. Pressure-treated pine is denser than western red cedar – a Janka hardness around 870 lbf versus cedar’s 350 lbf1 – so it splits less readily, but pre-drilling near edges is still good practice. Use stainless steel or hot-dipped galvanized screws regardless: pressure-treated lumber contains copper compounds (alkaline copper quaternary or similar) that corrode standard zinc-plated fasteners faster than bare wood does.
References
- The Wood Database – “Western Red Cedar (Thuja plicata),” wood-database.com, species entry citing USDA Forest Products Laboratory data, accessed July 2026. Janka hardness 350 lbf, specific gravity 0.31.
- Eagle Claw Co. – “Best Screws for Cedar Fencing,” eagleclawco.com, 2024. Pre-drilling rule, #10 x 2″ stainless screw spec for 3/4″ pickets into 2×4 rails, and drill-bit visual check method.
- Eagle Claw Co. – “Complete Wood Screw Size Chart for Decks, Docks, Fences, Framing, and More,” eagleclawco.com, 2024. Pilot hole sizes by screw gauge near edges: #8 = 7/64″, #10 = 1/8″, #12 = 9/64″.
- Western Red Cedar Lumber Association – “Outdoor Fasteners,” realcedar.com, Western Red Cedar Lumber Association. Screw penetration depth of 1″ into support members; stainless steel as preferred fastener for cedar.
- Iowa State University Extension – “Yard and Garden: Hanging Basket Considerations,” Aaron Steil, Iowa State University Extension and Outreach, last reviewed April 2023. Container size and weight relationship under watering conditions.
Conclusion
Mounting fence plant hooks on cedar comes down to three decisions made before the drill touches the wood: find the rail, size the pilot hole to the screw gauge, and choose stainless steel fasteners. Get those three right and the hook will stay firm through wet winters and heavy baskets for as long as the fence stands.
For a broader look at bracket and hook styles across different surface types and planter weights, see the overview at Plant Hangers.