
A key holders wall mount is only as secure as the wall material behind it. Drywall, plaster and solid wood each call for a different pilot hole, screw and anchor, and the difference grows once leashes and bags join the keys. A plain nail in drywall supports only about 5 to 10 pounds1, and a loaded rack can pass that on a busy morning. This installation guide sits under the key holders overview and covers only the mounting work: measuring, leveling, drilling and fastening, surface by surface.
Quick Answer
How do you mount a key holder on drywall, plaster or wood?
Identify the wall material first, mark level holes, then drill pilot holes sized for that surface. Drive screws into a wood stud or solid wood wherever the layout allows. Where no wood sits behind the holes, use anchors rated for at least four times the expected load1. On plaster, tape the spot and drill slowly so the hard surface does not crack.
Key Takeaways
- A screw into a wood stud outperforms any hollow-wall fixing, and studs in most framed walls sit 16 inches on center1.
- In a magazine lab test in one-half inch drywall, a ribbed plastic anchor rated for 22 pounds held 80, and a snap toggle rated for 80 held 1802.
- Plaster over wood lath runs about 3/4 to 7/8 inch thick, so screws and toggles need extra length compared with drywall3.
- Pilot holes for wood screws should measure about 70% of the thread root diameter in softwoods and about 90% in hardwoods4.
- The common misconception is that hooks only pull straight down: anchors carry shear and tensile loads, and a hurried grab for a leash adds the outward pull1.
Before You Begin: Tools, Hardware and Wall Types
A key holder installation needs a drill, a level, a tape measure, a pencil, painter’s tape and the fixings that suit the wall. The installation takes well under an hour and suits a beginner who has operated a drill before. Most wrought iron key holders mount with two screws through holes in the backplate.
Drywall is a panel of gypsum plaster pressed between paper facings and screwed to wood or metal studs. Plaster and lath is the older wall system in which wet plaster was pressed over thin wood strips, metal mesh or gypsum board. A wall stud is a vertical framing member, usually a wood 2×4, that carries the wall covering. Knowing which of these sits behind the paint decides every later choice.
| Factor | Drywall | Plaster and lath | Solid wood |
|---|---|---|---|
| Typical covering thickness | 1/2 inch panel | About 3/4 to 7/8 inch on wood lath | Full board or trim thickness |
| Drill bit | Standard twist bit | Masonry bit at low speed, no hammer mode | Twist or brad-point bit |
| Best fixing | Screw into a stud | Screw into a stud through the plaster | Wood screw, no anchor |
| Fallback fixing | Toggle or self-drilling anchor | Toggle sized for the full wall depth | Longer screw if the board is thin |
| Main risk | Anchor pulling out under a tug | Cracking and loose plaster keys | Splitting near an edge or end grain |
The thickness row explains most installation failures, because a screw sized for one wall rarely suits another. Drywall in the magazine test that informs this guide was one-half inch thick2. Plaster on wood lath needs about 3/4 to 7/8 inch, plaster on metal lath at least 5/8 inch, and plaster on gypsum lath at least 1/2 inch3.
Buy fixings after identifying the wall, not before, because the right screw for drywall is often too short for plaster.
Step 1: Identify What the Wall Is Made Of
By the end of this step, the installer knows the wall material and where the nearest stud sits. Plaster was the wall surface chosen for nearly all buildings until the 1930s or 1940s3, while later rooms almost always have drywall. A few quick tests settle the question without opening the wall.
The tap, push and pin tests
Knocking along the wall with a knuckle is the quickest test: drywall sounds hollow between studs and gives slightly under a firm thumb, while plaster feels hard, cold and dense. A pushpin slides into drywall with little effort, but it stops dead against plaster.
Tommy Silva, the plumbing and heating expert on This Old House, finds studs by ear, listening for the shift in tone as he knocks.
“The sound and the pitch goes from a little hollow, low pitch to something a little higher.”1
Tommy Silva, plumbing and heating expert, This Old House
Locating the stud behind the holder
An electronic stud finder works well on drywall but struggles on thick plaster, so the knock test and a small probe hole are more reliable there. Electrical boxes are fixed to studs, which makes a switch or outlet a useful starting point. From one confirmed stud, the next usually sits 16 inches on center1.
Confirm each stud with a thin finish nail driven where the holder will cover the hole. Resistance after the covering means wood; a nail that slides through means a hollow cavity.
Five minutes spent locating a stud saves the expense and uncertainty of an anchor in most entryways.
Step 2: Measure, Mark and Level the Holes
By the end of this step, two level pencil marks show exactly where the screws will go. Accurate marks matter more on a key holder than on a picture, because the screws hold the bar directly and leave no wire to adjust afterward. The mounting height is a separate decision, explained in the key holder height guide.
- Measure the distance between the backplate holes from center to center, and write it down.
- Put a strip of painter’s tape on the wall at the chosen height, which protects paint and gives a clean drawing surface.
- Mark the first hole, then use a level along the tape to draw a straight horizontal line.
- Measure the hole spacing along that line and mark the second hole.
- Hold the holder up to the marks and check the bubble once more before drilling.
A paper template speeds up the installation considerably: trace the backplate on stiff paper, punch the hole positions with a pencil, and tape the template to the wall. Adjust it until the level reads true, then mark through the punched holes.
Checking for hidden wiring and pipes
Avoid marks directly above or below a switch or outlet, where electrical cables commonly run vertically inside the wall. Kitchen and bathroom walls can also conceal water pipes. A stud finder with a wiring mode reduces the risk, and shifting the holder a few inches sideways removes it.
Where the holder sits beside a door, check the door swing and the light switch before marking. The room placement comparison covers how routine and clearance shape the choice of wall.
A level line on tape is the cheapest insurance in the whole installation, since moving a misplaced hole costs a patch and a second drilling.
Step 3: Drill Pilot Holes Sized for the Surface
By the end of this step, each mark has a clean pilot hole of the right diameter and depth. A pilot hole is a small hole drilled before driving a screw, so the threads cut into material instead of splitting or cracking it. The correct size depends on whether the screw goes into wood or into an anchor.
Pilot holes into wood studs and solid wood
The USDA Forest Products Laboratory sizes wood screw lead holes at about 70% of the thread root diameter in softwoods and about 90% in hardwoods4. Pine studs are softwood; oak trim and many solid wood panels are hardwood. Holding the bit beside the screw shows the root diameter: only the threads should stand proud of the bit.
Drilling holes for drywall anchors
An anchor hole follows the anchor package exactly, never the screw size. A hole that is too large lets the anchor spin, and a hole that is too small crushes the gypsum around it. Self-drilling anchors need no pilot hole at all and screw straight into drywall.
Drill straight in, at a right angle to the wall, and let the bit do the work. On drywall, stop once the bit breaks through the back face. On plaster, use a masonry bit at low speed with hammer mode switched off, and press gently so the surface does not chip around the hole.
The pilot hole is where most mounts are won or lost, because a well-sized hole lets an ordinary screw reach its full holding strength.
Step 4: Match Screws and Anchors to the Load
By the end of this step, the fixing for each hole is chosen by its planning load rather than by what came in the box. This Old House advises that anchors should be able to hold four times the weight of the object being hung1. That margin covers tugs, uneven hooks and gypsum that weakens with age.
A wall anchor is a sleeve or toggle that spreads a screw’s load across the drywall where no stud sits behind it. A toggle anchor is a type that opens behind the panel and clamps against its back face, which spreads the load over a wider area than a plastic sleeve.
Family Handyman tested seven anchors in one-half inch drywall and found that all but one exceeded their rated weight2. Dividing each rating by four turns those labels into a planning load per anchor. A ribbed plastic anchor rated for 22 pounds plans to 5.5 pounds under the four-times rule12. A snap toggle rated for 80 pounds plans to 20 pounds12.
The chart separates two jobs that look alike on the shelf. A ribbed plastic anchor suits a keys-only holder, while toggles suit a rack that will carry leashes and a bag. Because a key holder uses two screws, its planning load is roughly double the per-anchor figure, provided both screws carry weight equally.
Screw length for each wall
A screw going into a stud should pass the backplate and the wall covering, then bite at least 1 inch into the wood. The Forest Products Laboratory notes that withdrawal load varies directly with the depth of penetration of the threaded part4. On one-half inch drywall, a 1-1/2 inch screw usually suffices. On plaster over wood lath, which runs about 3/4 to 7/8 inch thick3, a 2 inch or 2-1/2 inch screw reaches the same bite.
Treat the number on an anchor package as a failure point, not a working load, and the choice of fixing becomes simple arithmetic.
Step 5: Mount the Key Holder on Drywall
By the end of this step, the holder is fixed to drywall with screws in a stud or with anchors sized for the load. Drywall is the easiest of the three surfaces to drill, yet it is the weakest at holding a screw on its own. A simple nail in drywall supports about 5 to 10 pounds1, so a nail or a bare screw is never enough for a working key rack.
When a stud sits behind the holder
Where at least one hole lands on a stud, drive a wood screw there first. Then fix the second hole with a stud screw or an anchor, depending on what sits behind it. One screw in wood carries most of the load and keeps the bar from rocking, even when the other end is anchored.
When both holes land between studs
Use two anchors of the same type so both ends share the load evenly. For a keys-only holder, the plastic anchors supplied with many racks are adequate. For a rack that will carry leashes or a bag, upgrade to toggles. The rated loads in the lab test ranged from 22 pounds for a ribbed plastic anchor to 90 pounds for a metal drill toggle2.
- Push or tap each plastic anchor into its hole until the flange sits flush with the wall.
- For toggles, fold the wings, push them through the hole and pull back until they grip the back face.
- Hold the holder in place and start both screws by hand before tightening either one.
- Tighten until the backplate is snug, then stop: overtightening strips the anchor or crushes the gypsum.
The White Classic holder ships with screws and wall anchors, which suit drywall when the holder carries keys alone. Its five hooks spread along one bar, so the load is shared between the two fixings at each end.
On drywall, a single stud screw does more for a key holder than any upgrade in anchor brand.
Step 6: Mount on Plaster Without Cracking It
By the end of this step, the holder is fixed to plaster with no cracks around the holes. Plaster walls are generally stronger than drywall but more prone to cracking, and they need careful handling and suitable anchors1. The key is slow drilling, a sharp masonry bit and fixings long enough for the thicker wall.
Traditional plaster grips its lath through small lumps of plaster pushed between the strips. The National Park Service guidance on historic plaster describes how wet plaster slumps through the gaps in wood lath to form these lumps.
“These keys hold the plaster in place.”3
National Park Service, Preservation Brief 21: Repairing Historic Flat Plaster Walls and Ceilings
Hammering, vibration and an oversized bit can break those keys, which is why a loose bulge sometimes appears around a careless hole, and gentle drilling protects them.
Drilling sequence for plaster
Lay an X of painter’s tape over each mark to stop chips from spreading. Start with a small masonry bit at low speed, then step up to the final size. Switch hammer mode off, because the hammer action shakes the plaster keys loose behind the surface.
Choosing the fixing for plaster
A screw through the plaster into a stud remains the strongest option. The screw must cross the full wall thickness, which reaches about 3/4 to 7/8 inch on wood lath3. Where no stud sits behind a hole, use a toggle whose rated wall range covers that depth, since short drywall anchors will not open behind it.
Wood lath strips can hold a light keys-only holder when a screw lands in one, but they are thin and old. Locate the stud for any holder carrying leashes or bags. The Vertical key holder mounts in a narrow column, which makes it easier to line both screws up on a single stud in an older hallway.
Plaster rewards patience: slow drilling and longer screws turn the hardest wall in the house into the most secure one.
Step 7: Fasten Directly Into Wood
By the end of this step, the holder is screwed straight into solid wood with no anchor at all. Solid wood includes plank walls, thick wood paneling over studs, a mudroom backer board and wide door casing. It is the simplest surface to mount on, provided the pilot hole and screw length suit the board.
Screws grip best in side grain, the face of a board. The Forest Products Laboratory found that screws in end grain should average 75% of the load sustained by screws in side grain, and only when splitting is avoided4. A holder fixed to the cut end of a beam or post therefore needs longer screws and a careful pilot hole.
Mounting on or beside door trim
Door and window openings are framed with extra studs, so the wall just beside the casing usually has wood behind it. A curtain holdback guide on Hunker applies the same logic: within 3 inches of a window frame, long screws go straight into the wall, with toggle anchors beyond that5. The same guide notes that holdbacks mounted on trim need toggle bolts, because a thin casing alone can pull away from the wall5.
Avoiding splits in hardwood and thin boards
Keep each screw at least 3/4 inch from the edge of a board, and drill the pilot hole to the full screw depth in oak or maple. In its guidance on nails, the Forest Products Laboratory notes that lead holes prevent or reduce splitting, particularly in dense species4. In wood paneling thinner than 1/2 inch, find the stud behind the panel and use a screw long enough to reach it.
Solid wood is the forgiving surface, but only side grain and a sized pilot hole give a wood screw its full grip.
Leashes and Small Bags Change the Mounting Choice
A key holder that carries leashes, dog collars or a small tote needs a stronger fixing than one that holds only keys. Manufacturers rate anchors for shear, a sideways or downward pull, and for tension, a pull straight out of the wall1. Lifting a leash or a bag strap off a hook in a hurry adds that outward pull.
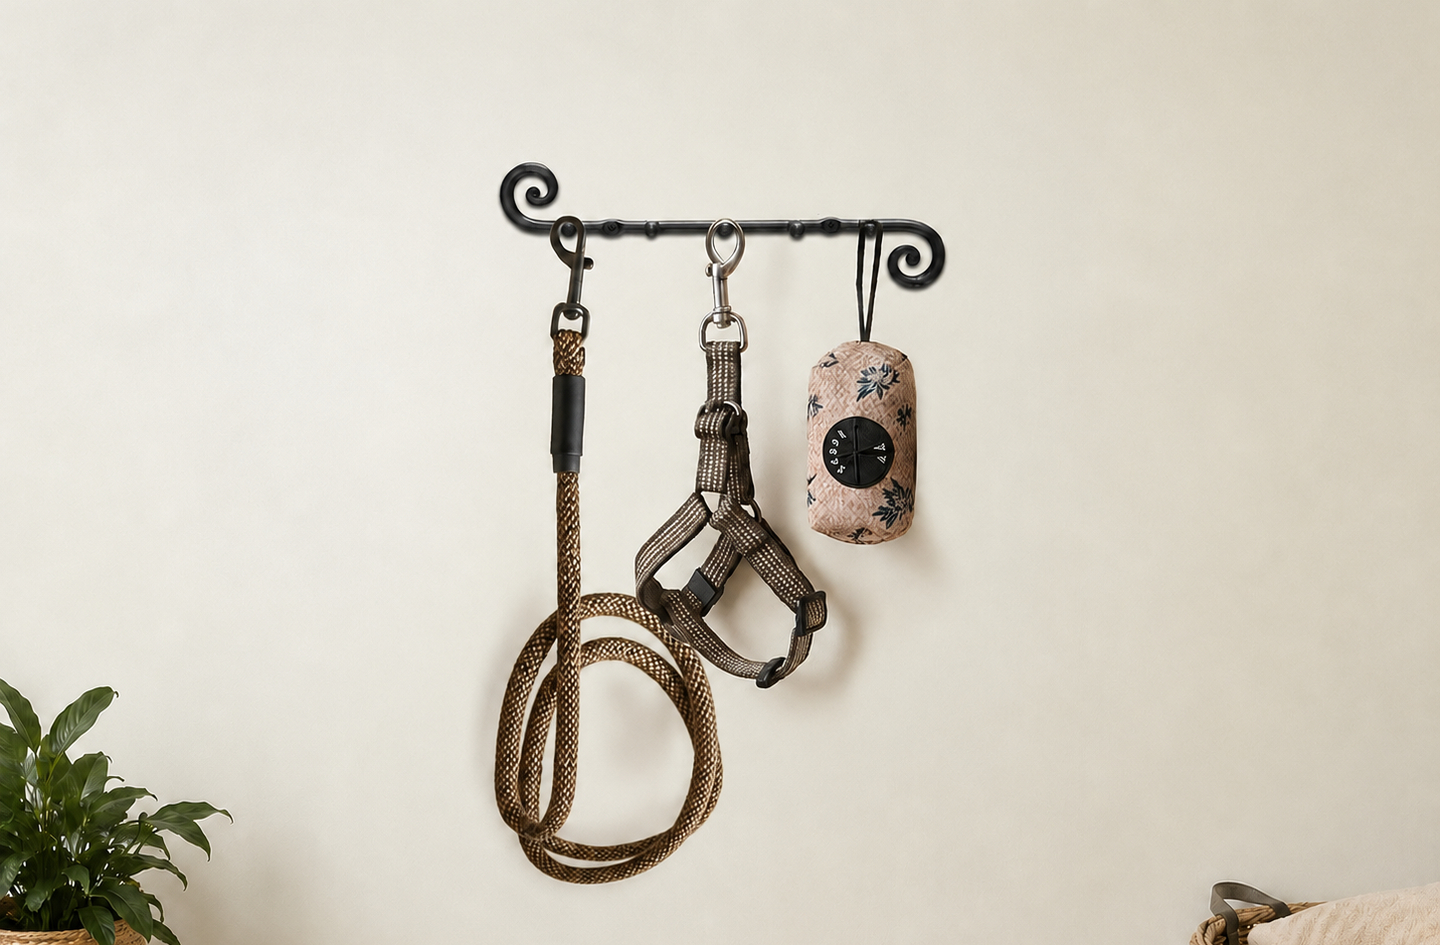
A keys-only holder carries little more than its own weight, so the anchors supplied in the box are usually enough. A leash, a dog collar and a canvas tote add both weight and daily tugging. For that use, put at least one screw in a stud, or use toggles at both ends.
Hook spacing and backplate length
Bulky items need additional room, because a tote or a coiled leash on one hook pushes against the neighboring hook, so leave one free hook between bulky items where possible. A longer backplate also helps, since screws placed farther apart resist rocking when one end is loaded.
The Black Classic holder has five forged hooks across a sturdy backplate and ships with screws and anchors. That spread suits a household that hangs keys at one end and a leash at the other.
A simple load check
Weigh the heaviest items on a bathroom scale while holding them, then subtract body weight. Multiply the total by four, which follows the This Old House rule for anchors1. Compare that figure with the combined rating of the two fixings, and step up to toggles or a stud screw if it falls short.
Narrow entryways bring a different trade-off, since a slim holder leaves less room between bulky items. The compact key holder ideas cover layouts that keep hooks usable when wall width is limited.
Plan the fixing for the heaviest thing the household will ever hang, because a leash or a bag is added without anyone revisiting the screws.
Common Mistakes to Avoid
Most failed key holder installations trace back to fixings chosen for the wrong wall or the wrong load. Each mistake below has a simple cause and an equally simple fix.
- Trusting a nail or bare screw: a nail supports only about 5 to 10 pounds in drywall1, and a bare screw strips the gypsum under a tug. The fix is a stud screw or an anchor rated well above the load.
- Overtightening the screws: overtightening spins plastic anchors in their holes, crushes the gypsum around them and can crack a plaster surface, so tighten only until the backplate is snug.
- Skipping the pilot hole in hardwood: driving a screw into oak or maple without a pilot hole splits the wood or snaps the screw. The fix is a pilot hole of about 90% of the root diameter in hardwoods4.
- Using drywall anchors in plaster: short drywall anchors cannot open behind plaster that is about 3/4 to 7/8 inch thick on wood lath3. Choose a toggle rated for the full wall depth or reach a stud.
- Marking without a level: a tilted holder looks careless and lets keys slide to one end, while a level line on painter’s tape prevents the problem.
Nearly every mistake on this list comes from treating all walls alike, which is the habit this guide exists to break.
What a Secure Key Holders Wall Mount Looks Like
A secure key holders wall mount sits level, flush and motionless when pushed, pulled and loaded. If the installation went correctly, the backplate shows no gap at either end, and the screw heads sit flat without spinning. On plaster, the surface around each hole is intact, with no hairline cracks or bulges.
- Level check: the bubble sits centered with the holder in place.
- Push test: a firm push on each end produces no movement or creaking.
- Load test: hang the heaviest bag or leash and give it a sharp tug outward.
- Surface check: no cracks, dust or bulges around the screw heads.
A mount that passes these checks will carry daily use for years. Wrought iron holders forged from solid iron add no flex of their own, so any movement points to the fixing rather than the holder. If something shifts, revisit the anchor choice before anything else.
The real test of a successful installation is that nobody in the household ever considers it again.
Frequently Asked Questions
Can a key holder be mounted on drywall without a stud?
Yes, provided the anchors are sized for the expected load. In a laboratory test in one-half inch drywall, anchors rated from 22 to 90 pounds all met their ratings2. Divide the rating by four for a safe planning figure, and choose toggles for any rack that will also carry leashes or a bag.
What size pilot hole does a key holder screw need?
For a screw going into wood, drill about 70% of the thread root diameter in softwood and about 90% in hardwood4. For an anchor, follow the bit size printed on the anchor package exactly, although self-drilling drywall anchors need no pilot hole at all.
Will drilling into plaster crack the wall?
Plaster cracks more easily than drywall, but slow drilling prevents most damage1. Tape the spot, use a masonry bit at low speed with hammer mode off, and step up the bit size gradually. Plan for a wall about 3/4 to 7/8 inch thick on wood lath3.
How much weight can a wall-mounted key holder carry?
The fixing determines the limit, not the wrought iron holder itself. A nail in drywall supports only about 5 to 10 pounds1, while toggles in the same test held 130 to 180 pounds2. A screw into a stud carries more than either and suits leashes and bags.
Are the screws and anchors in the box good enough?
For keys alone on drywall, supplied screws and plastic anchors usually work. Check the anchor rating against four times the expected load1. For plaster, leashes or bags, replace them with longer stud screws or toggles rated for the wall depth.
Limitations and Edge Cases
- This guide covers interior drywall, plaster and wood installations, while brick, concrete and tile need masonry bits and masonry anchors1, and their drilling sequence differs.
- Anchor figures come from one magazine test in one-half inch drywall, updated in 2024. Thicker drywall, other brands and aged gypsum will perform differently.
- Plaster thickness varies with the age of the house and the skill of the original plasterer, so a probe hole is the only sure measure.
References
Methodology: every figure in this article comes from an independent published source and links to the page that carries it. The planning loads in the chart divide published anchor ratings by a published safety rule, and the article is reviewed by Rami Abramson.
- This Old House – How To Hang Something Heavy On a Wall, Jim Gorman, updated June 2026.
- Family Handyman – How Much Weight Can Drywall Anchors Hold In Your Home, HomeLAB test by Jason Ingolfsland, updated October 2024.
- National Park Service – Preservation Brief 21: Repairing Historic Flat Plaster Walls and Ceilings, Marylee MacDonald, 1989.
- USDA Forest Products Laboratory – Wood Handbook: Wood as an Engineering Material, General Technical Report FPL-GTR-282, Chapter 8 Fastenings, edited by Robert J. Ross, 2021.
- Hunker – How To Install Curtain Holdbacks, Laurie Brenner, updated August 2022.
Conclusion
A key holder mounts securely when the fixing matches the wall: wood screws in studs or solid wood, toggles in hollow drywall, and longer screws through plaster. Size every pilot hole to the surface, and plan anchors at four times the load the rack will carry. Leashes and bags raise that load, so they deserve a stud screw or toggles from the start.
For how installation fits the wider topic of choosing and using key holders, see the key holders overview.