
A compact key holder solves a narrow-wall problem by trading width for height: a vertical strip of hooks fits beside a door frame where a long horizontal rack never could. This guide sits under the key holders overview and focuses on one situation, the small entryway with very little open wall. Depth matters as much as width, because accessibility rules limit wall-mounted objects in a walkway to 4 inches of projection1. The seven ideas cover vertical layouts, shallow profiles, hook count, and clearance from switches and door frames.
Quick Answer
What is the best compact key holder setup for a small entryway?
For a narrow wall, the most practical choice is a vertical key holder with about five hooks. Mount it on the latch side of the door, clear of the switch plate. Choose a shallow model, because objects in a walkway between 27 and 80 inches above the floor should protrude no more than 4 inches1. Fix it into a stud where possible.
Key Takeaways
- Accessibility standards cap objects in a walkway at 4 inches of projection between 27 and 80 inches above the floor1. A shallow holder suits a tight hallway best.
- Standard door casing is typically 2 1/4 inches wide5, so the open wall beside many front doors starts closer to the opening than it looks.
- The ideal light switch height is about 48 inches4, which puts the switch plate in the same band where most people want their keys.
- Habit research found about 43 percent of everyday actions repeat in the same context2, so one fixed spot by the door matters more than the size of the rack.
- The common misconception is that a small entryway needs a small number of hooks; a vertical layout keeps five hooks inside a strip of wall only a few inches wide.
1. A Vertical Key Strip Beside the Door Frame – Best for Walls Under a Foot Wide
A vertical key strip is the most space-efficient compact key holder layout, because it stacks hooks top to bottom instead of spreading them across the wall. On a narrow entry wall, width is the scarce resource and height is usually free. Turning the rack on its end matches the hardware to the space.
Door casing is the decorative trim that frames a door opening and covers the gap between the jamb and the wall. The most widely used door casing is 2 1/4 inches wide, and some profiles run up to 3 inches5. That trim eats into the open wall beside the door, so the true mounting space starts at the outer edge of the casing, not at the door itself. Measure from that outer edge to the nearest corner, cabinet or switch plate, and the remaining figure is the real budget for the holder.
Why vertical beats horizontal on a narrow wall
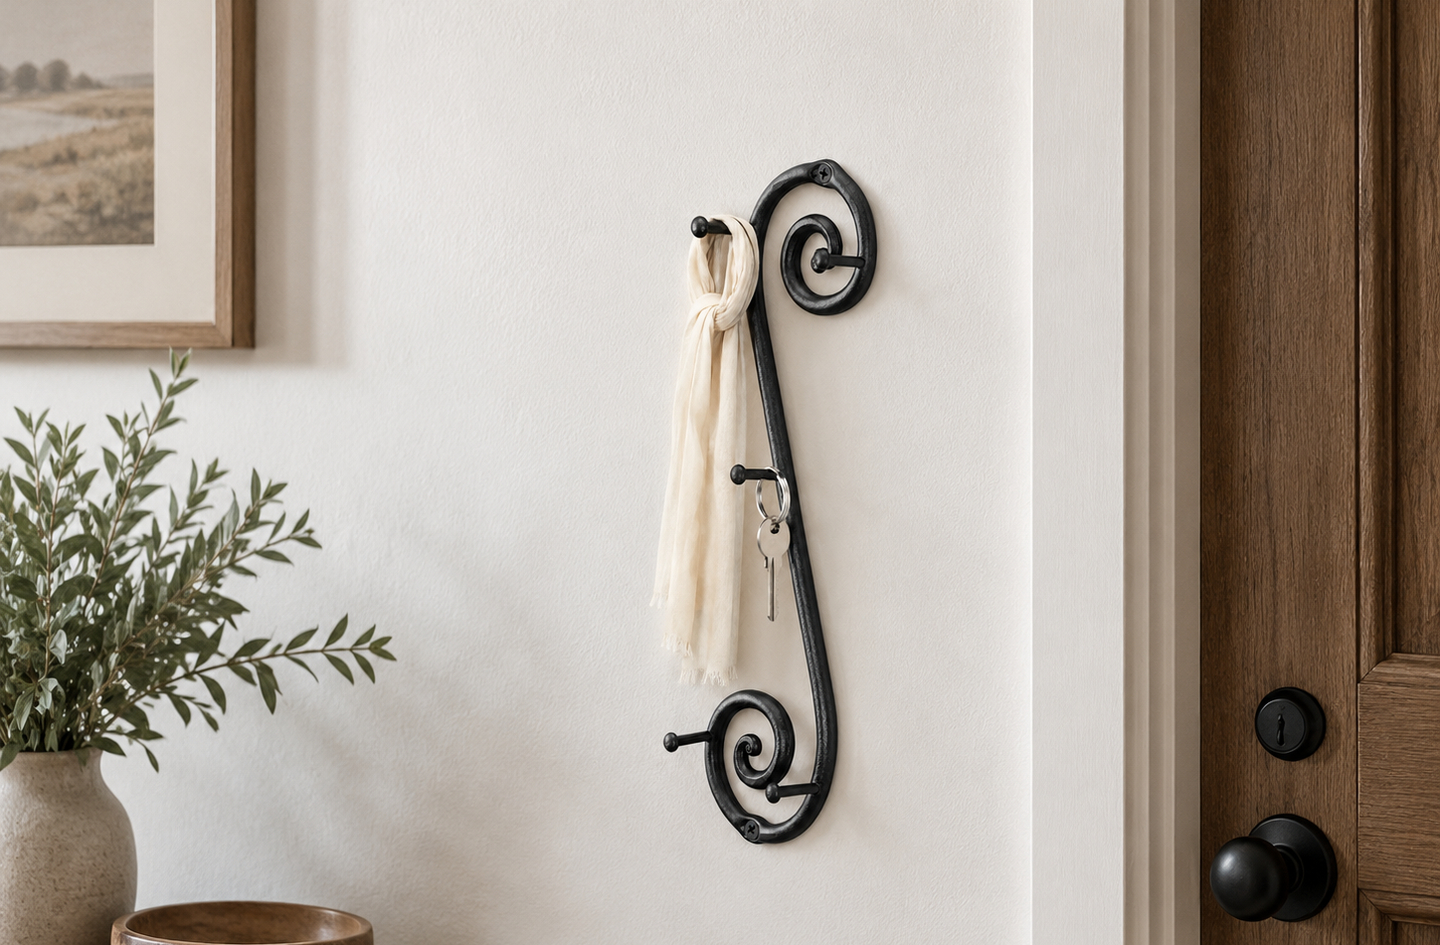
A horizontal bar with five hooks needs enough width for every hook plus finger room between them. A vertical holder with the same hook count needs only the width of its backplate and hooks. The rest of the wall stays clear for a light switch, a mirror or a coat hook. The Vertical key holder follows this idea: a narrow wrought iron profile with forged hooks arranged in a column for keys and lanyards.
Leaving a clean gap at the trim
Mounting the backplate tight against the casing looks cramped, and it also puts screws close to the framing edge around the door. A small gap, roughly the width of two fingers, lets the trim read as trim and the holder read as its own object. It also leaves room to repaint the casing without unscrewing the rack.
Vertical layouts suit renters and owners alike, because two screws hold the whole column and the holes sit in a narrow line that is easy to patch later. The arrangement also scales: a household with more keys simply chooses a taller strip, not a wider one.
On any wall narrower than about a foot, start with a vertical holder. Consider a horizontal bar only if room remains after the casing and switch plate.
2. A Staggered Infinity Layout – Best for Bulky Fobs and Lanyards
Staggered hooks solve the main weakness of a straight vertical column: bulky items hanging on one hook collide with the items below. When hooks alternate left and right along a slender frame, each key ring drops into its own lane. A thick car fob then never buries the house key underneath it.
The Infinity key holder uses this approach, with staggered hooks set along a loop-shaped vertical frame. The shape keeps the footprint narrow while giving each hook slightly more side clearance than a straight column could. That matters most in households where several people hang a fob, a lanyard and a key ring at the same time.
Why fobs deserve their own hook
Modern car keys are small electronic devices, and a dropped or misplaced one is an expensive problem rather than a minor nuisance. Replacing the latest fobs costs $50 to $400 depending on the brand, plus another $50 to $100 for programming and a mechanical backup key7. Consumer Reports put the range plainly.
“The cost to replace the latest key fobs can run anywhere from $50 to as high as $400 depending on the brand.”7
Mel Yu, automotive analyst, Consumer Reports
Matching hook spacing to what hangs there
A slim house key needs very little room, while a fob with a leather strap or a lanyard needs space to hang straight. Put the bulkiest item on the lowest hook, where nothing sits underneath it, and keep the slimmest keys near the top. On a staggered holder, assign each person a side so the layout stays readable at a glance.
Choose a staggered holder whenever two or more car fobs share the wall, because the cost of losing one outweighs the small extra width the stagger takes.
3. A Shallow-Profile Holder for Walk-Through Hallways – Best for Tight Paths
A shallow holder is the safest compact choice for a hallway people walk through, because depth, not width, is what catches elbows, bags and shoulders. Projection is the distance an object sticks out from the wall surface, measured from the wall to its outermost point. In a narrow hall, every inch of projection comes straight out of the walking space.
The 2010 ADA Standards set the benchmark. Objects with leading edges more than 27 inches and not more than 80 inches above the floor shall protrude 4 inches maximum into a circulation path1. The same standards set the clear width of an accessible walking surface at 36 inches minimum1. Homes are not bound by these public-building rules, yet the numbers describe how much intrusion a walkway tolerates before it becomes a hazard.
Measuring projection with keys on the hooks
Projection should be measured with the holder loaded, not empty. A ring of keys hangs below the hook tip, but a fob with a strap or a lanyard can swing outward when someone brushes past. Hold a ruler level against the loaded hook and read the distance from the wall to the farthest point. If that reading passes about 4 inches in a walkway, choose a flatter holder or move it out of the path.
Where a deeper holder still works
A deeper rack is acceptable where nobody walks directly past. Good examples are the wall above a shallow console, the end of a short hall, or the corner behind the door’s swing. The protrusion rule applies to the circulation path itself, so a holder set over furniture that already blocks that strip of floor does not narrow the route any further.
Forged hooks help here because a hand-bent tip can curve back toward the wall rather than jut straight out. That curl keeps keys secure and holds the loaded depth down without shortening the hook.
If the holder hangs where people pass, treat 4 inches of loaded depth as the ceiling and pick the flattest design that still holds the household’s keys.
4. Single Forged Hooks in a Column – Best for Odd Gaps and Split Walls
Separate wall hooks are the most flexible compact key holder idea, because each hook can go exactly where the wall allows. A one-piece rack needs one uninterrupted strip of wall; three single hooks can step around a thermostat, a doorbell chime or an awkward outlet.
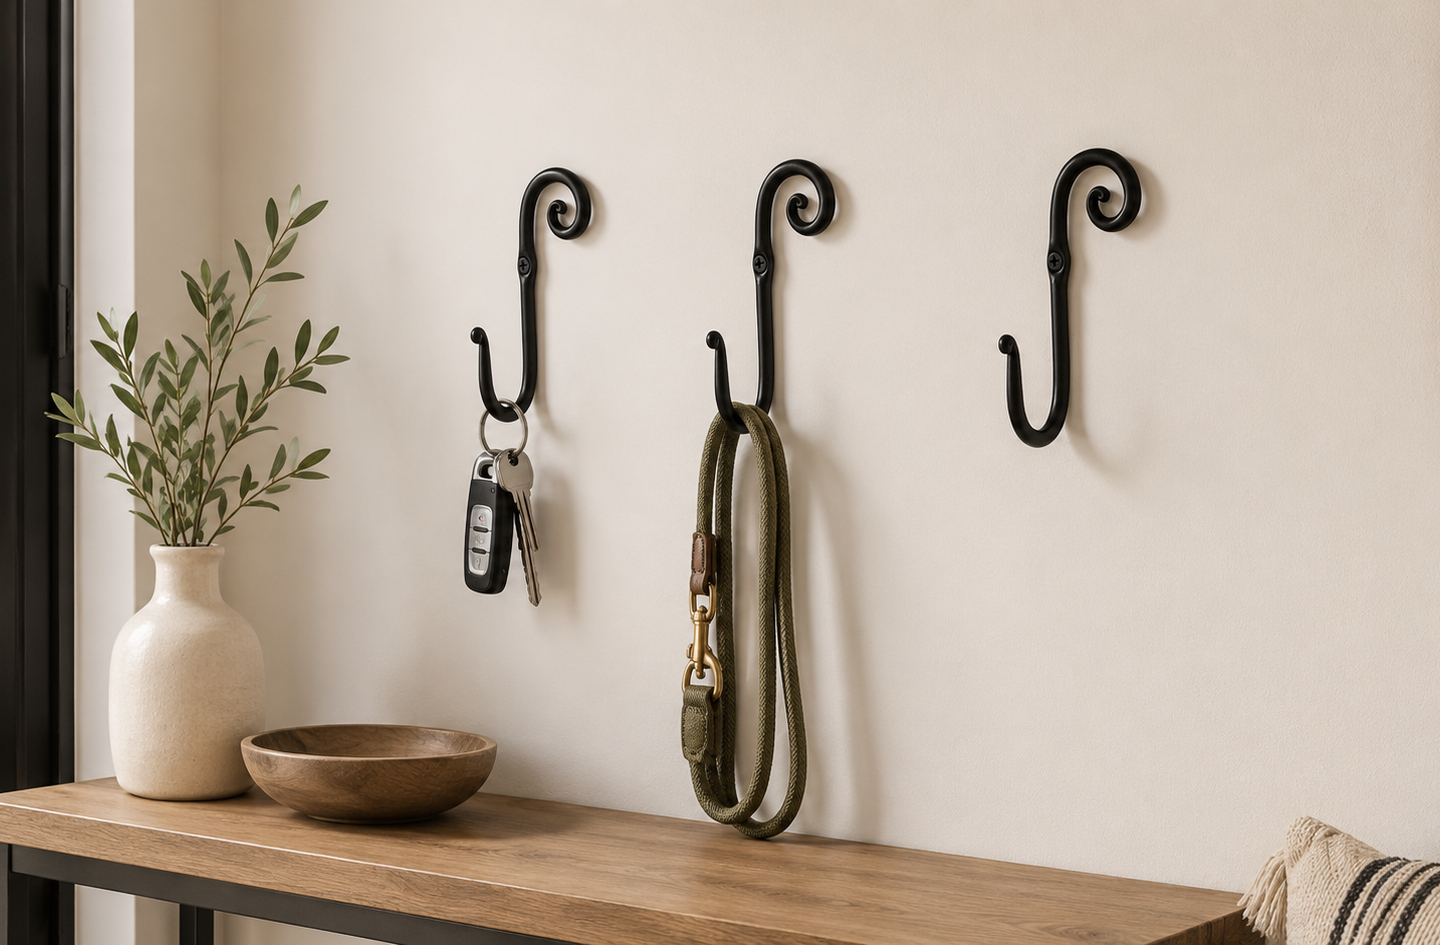
The Swirl wall hooks come as a set of three, each with an ornamental forged swirl end, which gives a matching look even when the hooks are spaced unevenly. Mounted in a short column, they hold keys on top, a leash in the middle and a light tote at the bottom. The whole set takes up only the width of a single hook.
Fixing each hook on its own
Single hooks carry less load each, but every one needs its own secure fixing. A simple nail in drywall supports only between 5 and 10 pounds6, and a leash hook takes sudden tugs that a key hook never sees. Where a stud is out of reach, choose an anchor rated well above the expected weight. As a rule, anchors should hold four times the weight of the object being hung6.
Keeping a column of single hooks tidy
A vertical line drawn with a level keeps separate hooks looking deliberate rather than scattered. Mark the top and bottom hooks first, then split the distance for the middle one. If an obstacle forces one hook off the line, shift the whole set to a new line instead of bending the column around it.
The step-by-step drilling, anchor and pilot-hole detail for each wall surface sits in the separate wall-mount installation guide, which covers drywall, plaster and solid wood.
Use single hooks when the open wall is broken up by fixtures, because three small fixings fit gaps that a single backplate cannot.
5. Pairing the Holder With the Light Switch Line – Best for Dark Entries
Lining a compact key holder up with the light switch turns the switch into a landmark the hand finds in the dark. The ideal light switch height is 48 inches from the floor4. Most adults reach for keys in roughly the same band, so the two compete for the same strip of wall beside the door.
Accessibility guidance sets the reach limits. Where a person approaches from the side with nothing in the way, the high side reach is 48 inches maximum and the low side reach 15 inches minimum1. A household with a wheelchair user, or young children who need their own hook, should keep at least one hook inside that band.
Placing the holder beside, not over, the switch
A holder mounted directly above the switch plate puts dangling keys in front of the toggle, and a swinging lanyard can flip it. Setting the holder to one side of the switch, with its lowest hook a little above the plate, keeps both usable. On a very narrow wall, the switch side away from the door is usually the cleaner choice, since the casing already crowds the door side.
Checking the wiring before drilling
Wiring runs up and down from a switch box, and sometimes sideways to the next outlet. Drilling directly above or below a switch is the riskiest spot on the wall for hitting a cable. Offsetting the holder sideways and using a stud finder with a wiring mode lowers that risk.
More detail on standard and family-friendly heights, room by room, sits in the sibling guide on key holder height and placement.
Treat the switch as the anchor point for the layout: keys within easy reach of it are found by habit, even with the lights off.
6. Latch-Side Placement Clear of the Door Swing – Best for Doors That Open Against the Only Wall
The latch side of the door is usually the best wall for a compact key holder, because the hand that just turned the key is already there. The hinge side is often hidden by the open door, so a holder there gets covered every time the door swings back.
Door approach space matters in a small entry. The ADA Standards flag any obstruction within 18 inches of the latch side that projects more than 8 inches beyond the face of the door. Such an obstruction changes the required approach clearance1. A shallow key holder stays far below that depth, which is another reason a slim, flat design suits the strip of wall next to the latch.
“About 43 percent of everyday actions are done repeatedly almost every day in the same context.”2
Wendy Wood, psychology professor, University of Southern California
Why the same spot matters more than the holder
A key holder only helps if the keys go back on it every time, and routine does most of that work. Harvard Health recommends leaving car keys, glasses and a cell phone in the same place every day so that finding them becomes automatic3. A holder on the latch side sits on the exact path of that routine: unlock, step in, hang the keys, close the door.
When the door opens against the only open wall
Some small entries have a single usable wall, and the door swings straight into it. In that case, mount the holder above the height of the door handle and far enough along the wall that the open door does not strike the hooks. A doorstop on the floor or the hinge keeps the handle from denting the wall and the keys.
Placement by room and routine, including bedrooms, kitchens and home offices, is covered in the sibling guide on key hanger placement.
Put the holder where the key leaves the lock, not where the wall happens to be emptiest, because the shortest path is the one a household repeats.
7. Split-Height Hooks for Keys, a Leash and a Small Bag – Best for Shared Households
A split-height layout gives each type of item its own level on one narrow wall. Keys go high, a leash sits in the middle, and a small bag or tote hangs at the bottom. It keeps a compact holder from turning into a tangle, because heavy items never hang over light ones.
Load is the main reason to separate them. Keys weigh very little, but a leash takes sudden pulls and a small bag adds steady weight. A plain nail in drywall supports only between 5 and 10 pounds6, so the hook that holds the bag deserves the strongest fixing on the wall. Studs in a typical framed wall sit 16 inches on center6, which often allows at least one screw to land in wood even on a narrow strip.
How many hooks a compact holder really needs
A useful hook count starts with the number of key sets in daily use, then adds one hook for a shared spare set and one for a leash or lanyard. For most two- or three-person households, five hooks covers that without crowding. A larger count belongs in a wider space, not on a narrow wall where extra hooks end up holding clutter.
Keeping a few daily accessories organized
Sunglasses, a badge on a lanyard and a dog’s waste-bag holder are the usual extras by the door. Each should earn a hook by daily use. Anything used weekly or less belongs in a drawer or a coat pocket, which keeps the narrow wall readable and the keys easy to spot.
A drop zone is a small, fixed spot near the entry where keys, bags and other daily items land on the way in. A split-height column is a drop zone compressed into a single vertical strip, which is why it works in entries too small for a bench or a console.
Give the heaviest item the lowest hook and the best fixing, and cap the hook count at what the household uses every day.
Compact Key Holder Comparison Table
The seven ideas differ mainly in the wall width they need, how far they project, and how many items they hold without crowding. The table sets them side by side so a narrow wall can be matched to a layout in one pass. Widths and depths are planning figures for a typical wrought iron holder, not product specifications.
| Idea | Best for | Open wall width needed | Loaded depth to plan for | Practical hook count |
|---|---|---|---|---|
| Vertical key strip | Walls under a foot wide | About 4 to 6 inches | Under 4 inches | 4 to 6 |
| Staggered infinity layout | Bulky fobs and lanyards | About 5 to 7 inches | Under 4 inches | 5 |
| Shallow-profile holder | Walk-through hallways | Varies by model | Flattest option | 3 to 5 |
| Single hooks in a column | Walls broken up by fixtures | Width of one hook | Depends on hook | 2 to 3 |
| Switch-line pairing | Dark entries | Beside the switch plate | Under 4 inches | 4 to 5 |
| Latch-side placement | Doors that cover the hinge wall | Strip past the casing | Under 4 inches | 4 to 5 |
| Split-height hooks | Shared households with a pet | About 4 to 6 inches | Deeper at the bag hook | 3 levels, up to 5 hooks |
Two patterns stand out. Every layout that suits a walkway keeps loaded depth near the 4-inch protrusion limit used in accessibility standards1. Every layout that suits a narrow wall gains capacity by adding height rather than width. A wall only a few inches wide can still hold five hooks if the layout runs vertically.
Measure the open wall first and the walkway second; those two numbers rule out most layouts before style enters the decision.
How These Compact Key Holder Ideas Were Selected
The seven ideas were selected from the layouts that fit a narrow entry wall, then filtered against four published constraints rather than hands-on testing. This is a research-based comparison; no product was load-tested for this article, and figures stay attributed to their original sources.
- Projection: how far the loaded holder stands off the wall, checked against the 4-inch limit for objects in a circulation path1.
- Width: how much open wall the layout needs once the door casing, typically 2 1/4 inches wide5, and the switch plate are subtracted.
- Reach: whether at least one hook can sit inside the 15 to 48 inch side-reach band1 for shared and accessible households.
- Routine: whether the layout puts the keys on the path from the lock into the home, which habit research links to repeated, automatic actions2.
Products named in the list were chosen because their published descriptions match the layout described: a narrow vertical frame, a staggered vertical frame, or a set of separate forged hooks. RTZEN, the publisher of this article, makes all three, so the links point to its own catalog. Each piece is hand-forged from solid wrought iron and finished with an anti-rust coating, which is relevant on an entry wall where wet keys and umbrellas pass every day.
Wrought iron is a tough, low-carbon iron that a blacksmith shapes by heating and hammering rather than pouring into a mold. Forging lets each hook be bent to a precise curl. That forging step is what allows a shallow hook to curve back toward the wall instead of jutting straight out.
Read the four constraints as a checklist: a layout that fails projection or width on a given wall is the wrong layout, however good it looks.
Frequently Asked Questions
How deep should a key holder be in a narrow hallway?
Keep the loaded depth at or under 4 inches if people walk past it. The ADA Standards limit objects between 27 and 80 inches above the floor to 4 inches of protrusion into a circulation path1. Measure with keys and fobs on the hooks, since straps swing outward.
How far from the door frame should a compact key holder go?
Start measuring at the outer edge of the door casing, not the opening. Standard casing is typically 2 1/4 inches wide5, so the usable wall begins past that trim. A gap of about two finger widths keeps the holder visually separate and keeps screws away from the framing at the door edge.
Can a key holder go next to a light switch?
Yes, and it often works well as a landmark. The ideal switch height is 48 inches4, so set the holder to one side of the plate rather than directly above it. That keeps dangling keys off the toggle and moves the drill away from wiring running up from the switch box.
How many hooks does a small entryway key holder need?
Count the key sets used daily, then add one hook for a spare set and one for a leash or lanyard. Five hooks suits most small households. Load matters more than count: a plain nail in drywall holds only 5 to 10 pounds6, so fix the bag or leash hook into a stud.
Does a key holder really stop people losing keys?
It helps when it sits on the daily path into the home. Habit research found about 43 percent of everyday actions repeat in the same context2, and Harvard Health advises keeping keys in the same place every day3. A holder by the latch turns that advice into a fixed spot.
Limitations and Edge Cases
- The ADA figures in this guide come from standards for public and commercial buildings. Private homes are not required to follow them, so they serve here as practical benchmarks for walkways and reach.
- Wall widths, depths and hook counts in the comparison table are planning ranges, not measured specifications. Check the listed dimensions of any holder against a tape measure on the wall.
- Masonry, tile and concrete entry walls need masonry bits and anchors, and the fixing advice here assumes framed drywall or plaster walls.
References
Methodology: every figure in this article comes from an independent published source linked below, each source was checked live and its supporting sentence recorded on the day of publication, and the article was reviewed by RTZEN co-founder Rami Abramson.
- U.S. Access Board – ADA Accessibility Standards, sections 307.2, 308.3.1, 403.5.1 and 404.2.4.3, 2010 Standards.
- NPR – Building Better Habits And Breaking Bad Ones, Hidden Brain, December 2019.
- Harvard Health Publishing – Tips to get the most out of your memory, Harvard Medical School.
- Bob Vila – The Ideal Light Switch Height for Any Room.
- Hunker – The Standard Wood Trim Molding Sizes.
- This Old House – How To Hang Something Heavy On a Wall, Jim Gorman.
- Consumer Reports – How to Replace Your Car’s Key Fob, quoting automotive analyst Mel Yu.
Conclusion
A compact key holder works on a narrow wall when it grows upward instead of outward and stays shallow enough for the walkway. It belongs on the latch side, where the key leaves the lock. Measure the open wall past the casing, keep loaded depth near 4 inches1, and give each item a hook by daily use. Hand-forged, zinc-galvanized and powder-coated, an iron holder chosen this way is built for real-world daily use and backed by a Lifetime Warranty.
For how this layout fits the wider topic of key storage, see the key holders overview.